1 iPhone XS/XS Max/XR Recovery by iTunes Restoration
Launch iTunes on the computer you are using (Mac or PC) to backup the data of your iOS device. Then, connect the device into the same computer through the original USB cable. If prompted to provide a passcode or trust the connected computer, please follow the instructions displayed on screen.
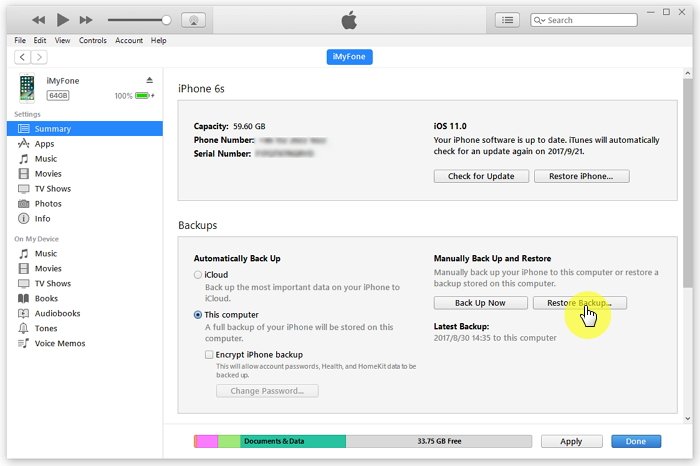
Then, select the iOS device you are using once it is appeared on your iTunes.
Now, you should select the option called Restore Backup in iTunes.
You can now select the most relevant backup from the list after considering the data and size.
Click on “Restore” and wait for the process to be completed. If prompted, provide the password to decrypt the iTunes backup. Don’t disconnect your device in the restore process. ads:
If you lost data after you updated to a new iPhone, you can always use Gihosoft iPhone Data Recovery to get the data back from the old iPhone or backup.
You may also like:iPhone Backup Extractor - Extract Data from iPhone Backup
Must Read:Jihosoft iTunes Backup Unlocker
2: iPhone XS/XS Max/XR Recovery by iCloud Restoration
Turn the device on and you will see the welcome screen. If the device is already configured, you will have to erase the data it contains before proceeding to the next step.
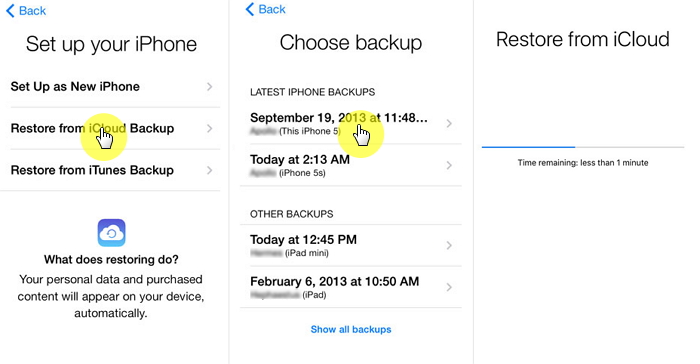
Carefully follow the onscreen setup to see Apps & Data screen. Choose tap Restore from iCloud backup.
You can now select a backup which you will restore. You can go through the information like data and size of the available backups and decide the most relevant one for you. After selecting the best backup, the transferring process will begin.
Provide the credentials and log into your Apple ID when prompted. That will allow you to restore what you have already purchased under the respective account. Wait for a while and stay connected.
Finish the setup process and you can now use the device without any trouble. Data like photos, apps, music etc. will get restored in the background. The duration of this process may vary depending on the amount of data. So, it is best to keep your device connected to Wi-Fi until the restoration is completed.
3: iPhone XS/XS Max/XR Recovery from iCloud.com
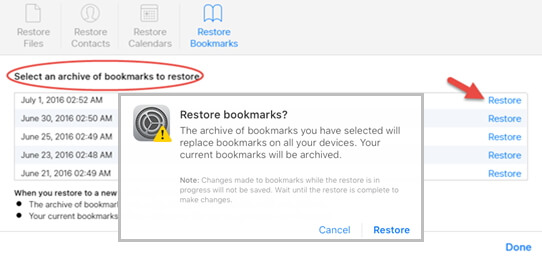
This method only works on files, contacts, calendar, bookmarks. Here we will take bookmarks as example.
Go to iCloud.com and sign in and go to the Settings option.
Scroll down on the screen and click on the option “Restore Bookmaarks”. This option can be found under “Advanced” option.
Now, click on the Restore button.
Confirm the restoration process simply by clicking on the Restore button once again.
At the completion of the above step, you should get a notification on iCloud.com. An email will be sent the Apple ID of yours.


Do you sometimes lend your device to a child to use? In that case you need to learn how to use guided access on iphone.
ReplyDelete