iOS 11 is finally here and Apple undoubtedly has some big changes coming in its new version of iOS, including a redesigned single-screen Control Center, smarter Siri, a new app drawer in Messages app and much more. Related Read: iMyFone Umate
Basically, iOS 11 doesn’t deliver a significant update to the operating system like iOS 10, but iOS 11 finally brings long-awaited updates and new features to iPad, which was completely ignored in iOS 10. iOS 11 includes a number of features for the iPad, promising to offer smoother performance and make your daily tasks even better.
In this post, we have compiled a list of five best iOS 11 features for your iPad. Before we begin, keep in mind that iOS 11 is now available in beta stages, so you may experience some bugs and glitches. We recommend you make a full backup of your iPhone or iPad before trying to install iOS 11 developer beta on your device. Related Read: iMyFone Umate
New Dock
iOS 11 introduces a new customizable Dock on the iPad. Basically, the Dock offers quick access to your most frequently used apps and documents. In iOS 11, you now can add more folders and apps to the Dock for quick access. Besides, you can remove an app from your iPad’s Dock and add it back to it.
While in an application, you can access the Dock by swiping from the bottom to top slightly. This allows you to quickly switch to another application on your iPad. Double tapping the home button will bring up multitasking pane and new Control Center.
New Multitasking system
Apple was previously rumored to improve the iPad multitasking system. Today, the Cupertino Company made that official. Multitasking functionality was first introduced in iOS 9, and it’s exclusively available on the iPad. In iOS 11, Apple introduced a brand new multitasking system that makes what you do most even better.
Now, while you are inside an app and you want to do something else, you just swipe up from the bottom to access the Dock and quickly open an app. If you want to go side by side with a couple of apps, drag an app from the Dock on to the screen and release your finger.
New App Switcher
iOS 11 introduces a brand new App Switcher. Now, you simply need to swipe up from the bottom of the home screen to access the App Switcher. From here, you have the multitasking pane, Control Center and the Dock, all consolidated into a single screen. To close an app, you now need to tap and hold until you see the X button and then tap on it.
System-wide drag and drop
In iOS 11, you can easily drag images, texts, and links from one app to another while you are in Split View mode. For example, if you are now running the Photos app and the Mail app side by side, you can easily drop a photo into your email by simply using the drag-and-drop gesture.
A new Files app
iOS 11 introduces a new File apps, which offers access to all files you have stored in iCloud Drive and in other third-party storage services like Dropbox or Google Drive. The best part is that you can easily drag and drop a file from your Dropbox or Google Drive into your email (when you have two apps open side by side).
How to Send Ringtones to iPhone through Email?
Every iPhone user would welcome the idea of having a perfect alternative that allows them send ringtones to their iPhone – whether it is from their computer or another iPhone. Although sending ringtones via email is an old transfer method, it is still a substitute platform to escape the hassles of only making use of iTunes on your iPhone. To achieve this, here are a few detailed, yet practical steps.
From iPhone to iPhone
Login to your email account.
Got to “Compose” to send a new e-mail and make yourself the recipient of the mail. Before saving or downloading the file, first ensure it is in M4R format. Click on your preferred ringtone file and save the file by downloading it.
Go to the ringtone file you want to set on your iPhone, upload it as an attachment, and send the e-mail.
Sign into your email account on your iPhone and download the attached file.
From computer to iPhone
Go to your browser and sing into your email account from your computer.
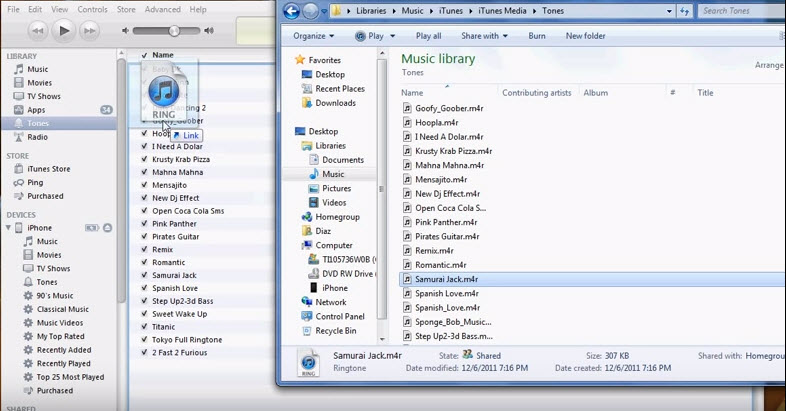
Connect your phone to your computer with a USB cord and open iTunes on your device.
Go to the folder where you already saved the ringtone file and move it to the iTunes Library section at the upper left hand corner of your computer. Ensure the ringtone file is moved to the “tones” subcategory.
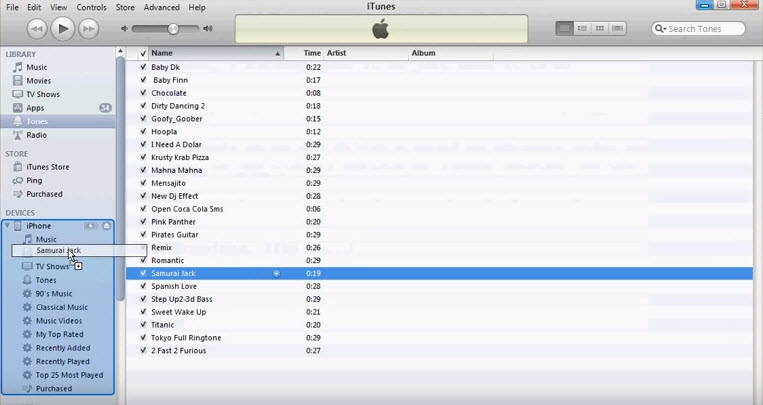
Move the ringtone file from iTunes to the “Devices” section of your iPhone. Your selected ringtone will automatically sync to your iPhone immediately the file is moved.
If you accidentally deleted or lost videos on iPhone, first please check on the Recently Deleted folder. Alternatively, you can use the professional tool
Gihosoft iPhone Recovery to
recover deleted iPhone videos from Camera Roll or some apps.